Project-Concept
As I started down my self-hosting adventures and home automation setup, I came to realise that most home sensors and smart devices are quite costly. This pushed me to either re-purpose a cheap device, or create my own. Seeing as most cheap solutions are rather locked down to prevent exactly what I am doing, I was only left with one choice, create something that works for me.
I ended up watching a ton of home automation videos from Everything Smart Home and one video in particular. He created his own home sensor using off the shelf components. The video in particular is This one in which he uses a mmwave sensor for motion and human presence sensing.
Staying on the cheaper side, I scrapped the mmwave sensor and went with just IR, and a few others. All of this is going to be powered by an ESP32 dev board, for now, installed on a breadboard for testing. The sensors I am adding are as follows:
- GY-302 Light Intensity Sensor
- HC-SR501 PIR Infrared motion sensor
- DHT11 Temperature and Humidity sensor
- MQ135 Air Quality sensor
Eventually, I will solder all of these parts to a prototype board, but for now until everything will remain on a breadboard until I complete this project. I want this to cost considerably less than just buying an off the shelf sensor. Most cost close to $100 Cad, and only have 1-2 sensor types inside. Where I want to create something that can be added onto in the future, and start with more sensors.
Materials-And-Cost
As of writing my original project report for class, here are the prices and components I was going to install:
| Item Name | Cost | Shipping | Taxes | Total |
|---|---|---|---|---|
| ESP32 Development Board | $14.49 | Prime | $1.55 | $16.04 |
| HC-SR501 PIR Infrared Sensor | $16.99 | Prime | $1.87 | $18.86 |
| GY-302 Light Intensity Sensor | $16.35 | Free | $0.98 | $17.33 |
| DHT11 Temperature & Humidity Sensor | $21.99 | Prime | $2.42 | $24.41 |
| MQ-135 Air Quality Sensor | $16.76 | Prime | Free | $16.76 |
| For Everything: | $93.40 |
However, These prices and the links to the products have changed since, so here is the new table with everything, including how many units come with each purchase:
| Item Name | Units | Cost | Shipping | Taxes | Total |
|---|---|---|---|---|---|
| ESP32 Development Board | 1 | $17.72 | Prime | $1.94 | $19.66 |
| HC-SR501 PIR Infrared Sensor | 2 | $7.99 | Prime | $0.87 | $8.86 |
| GY-302 Light Intensity Sensor | 2 | $15.99 | Prime | $1.75 | $17.74 |
| DHT11 Digital Temperature & Humidity Sensor | 5 | $14.99 | Prime | $1.65 | $16.63 |
| MQ-135 Air Quality Sensor | 1 | $17.49 | Prime | $1.92 | $19.41 |
| For Everything: | $82.30 |
Other Things you’ll need:
- Soldering Iron
- Breadboard
- Breadboard wires and adaptors
- Power supply for the ESP32
- A computer (Of course)
- Something running Home Assistant
Overview
After planning everything out and preparing to purchase everything, I noticed my air quality sensor was out of stock and would not get in, in time for me to complete this project for school, so it will be added at a later date.
For now, here is an overview of the parts we shall be using:
- Temp/Humidity Sensor - A composite Sensor contains a calibrated
digital signal output of the temperature and humidity. This sensor reads the temperature from your surroundings and extrapolates the humidity from that temperature. - Light Sensor - A digital Ambient Light Sensor IC for I2C bus interface. This sensor connects to your I2C bus and sends data via that. This sensor reads the light being emitted in the room with a range of 1-1111lux
- PIR Sensor - A analog sensor that reads inferred light passing by it and is pulled high when it senses something in front of it.\
Implementation
- To start off the project, I had to research and make sure all the sensors work with the ESP32
- Next after getting all my sensors, I set them up on a breadboard providing ample space between them so that nothing would block the front of they’re sensors.
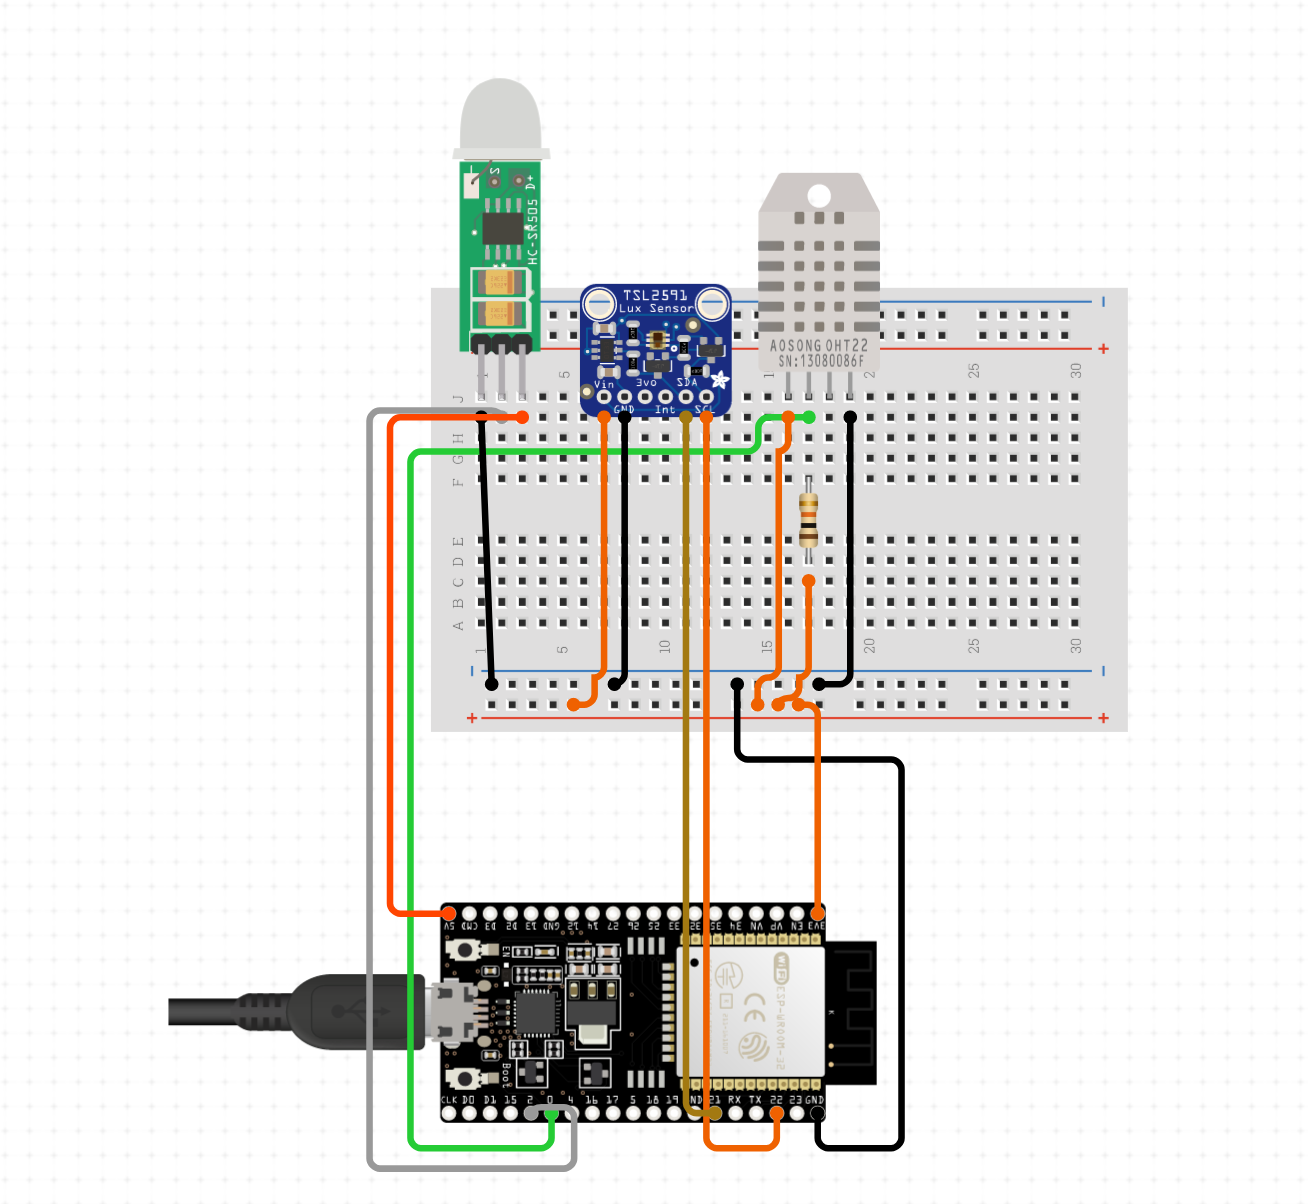
- Lastly, I wired up all of the sensors (As show below) and started the installation of ESPHome.
Circut Diagram:
Software
Software is a little different than you would normally go about it, its much simpler. First off depending on what type of machine you run (I.E Windows/Linux/OSX) this will change how you install the needed software onto the ESP32. For me, I went the linux route, which required me to install Docker (Already installed) and load up the esp software found here. I wont go into great detail with how to install this because there is quite a bit of stuff to cover, however here is the commands I had to use:
docker pull ghcr.io/esphome/esphome

docker run --rm -v "${PWD}":/config -it ghcr.io/esphome/esphome wizard homesensor.yaml

docker run --rm --privileged -v "${PWD}":/config --device=/dev/ttyUSB0 -it ghcr.io/esphome/esphome run homesensor.yaml

docker run --rm -v "${PWD}":/config -it ghcr.io/esphome/esphome run homesensor.yaml
The above commands setup the sensor with my given yaml file here:
esphome:
  name: homesensor

esp32:
  board: esp32doit-devkit-v1
  framework:
    type: arduino

# Enable logging
logger:

# Enable Home Assistant API
api:
  password: ""

ota:
  password: ""

wifi:
  ssid: "REDACTED"
  password: "REDACTED"
  #ssid: "REDACTED"
  #password: "REDACTED"
  # Enable fallback hotspot (captive portal) in case wifi connection fails
  ap:
    ssid: "REDACTED"
    password: "REDACTED"

captive_portal:


# Start of sensor section
# I2C Bus Config
i2c:
  sda: 21
  scl: 22
  scan: true
  id: bus_a

# BH1750 Ambient Light Sensor Config
sensor:
  - platform: bh1750
    name: "Illuminance Sensor"
    update_interval: 2s
# DHT11 Temperature/Humidity Sensor Config
  - platform: dht
    pin: 19
    temperature:
      name: "Temperature Sensor"
    humidity:
      name: "Humidity Sensor"
    model: DHT11
    update_interval: 2s


# AM312 PIR Sensor Config
binary_sensor:
  - platform: gpio
    pin: 18
    name: "PIR Sensor"
Anywhere you see “REDACTED” this data was left out for security purposes. This Yaml file tells the ESP32 where the sensors are and how to operate them.
Results
- My first test was the only one that I had troubles with, this came from the fact that I had set one of my sensors (The temp sensor) to the wrong pin in my yaml. After correcting this and re-uploading there was no issues. My device connected to the internet just fine, and then started to sync everything to my home server.
- After fixing the issue, data started pouring into my home assistant server showing everything I wanted.
Here is the final product:

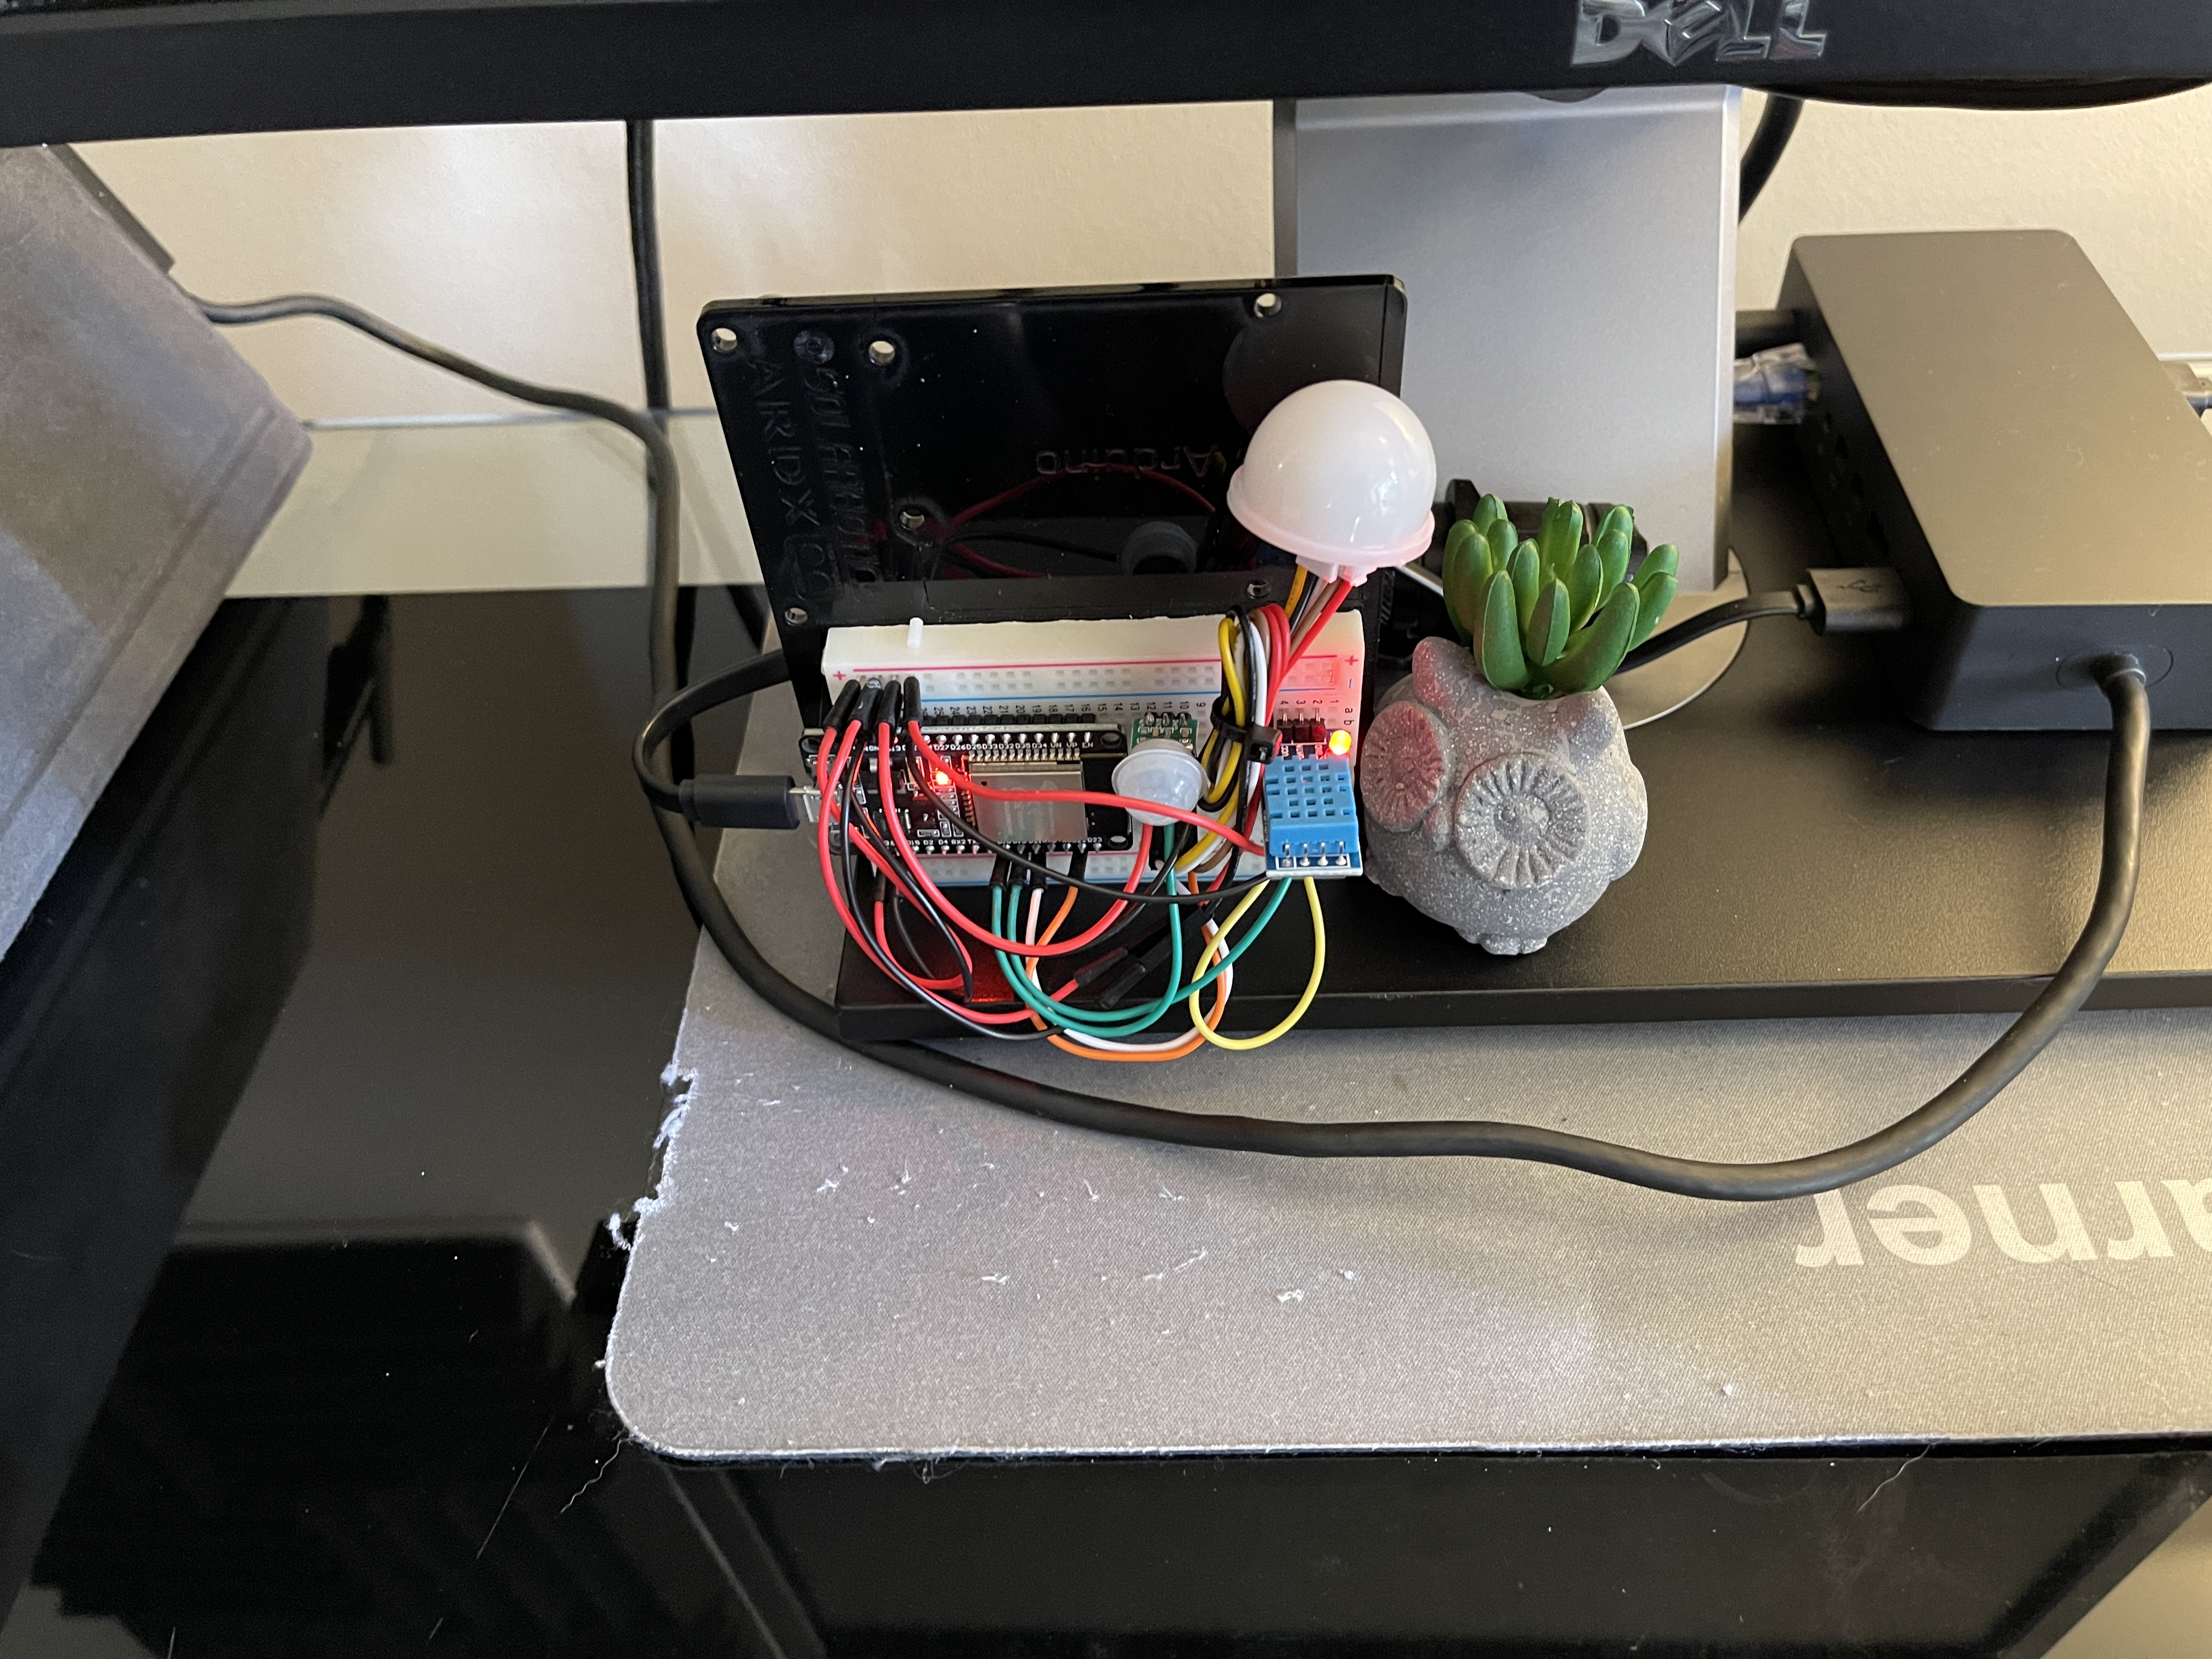
For the time being, until I add a few more sensors, it shall remain in this form, once I get those sensors in, I plan on soldering this to a prototype board and making it a housing so it has a permanent home.
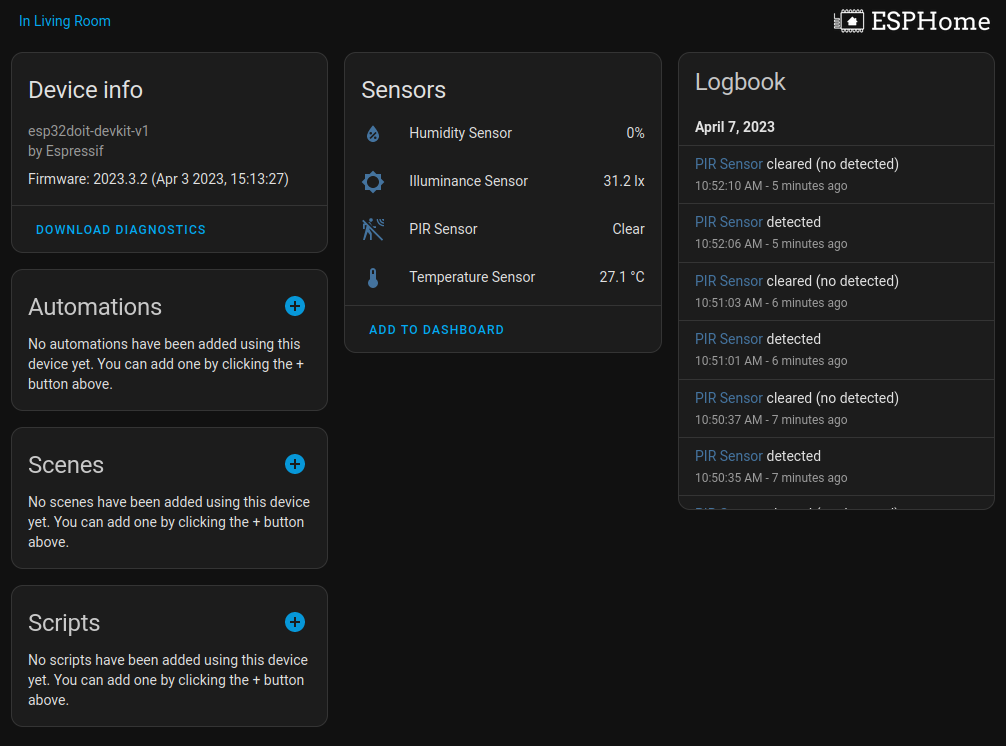
Here is what the data looks like in Home Assistant:
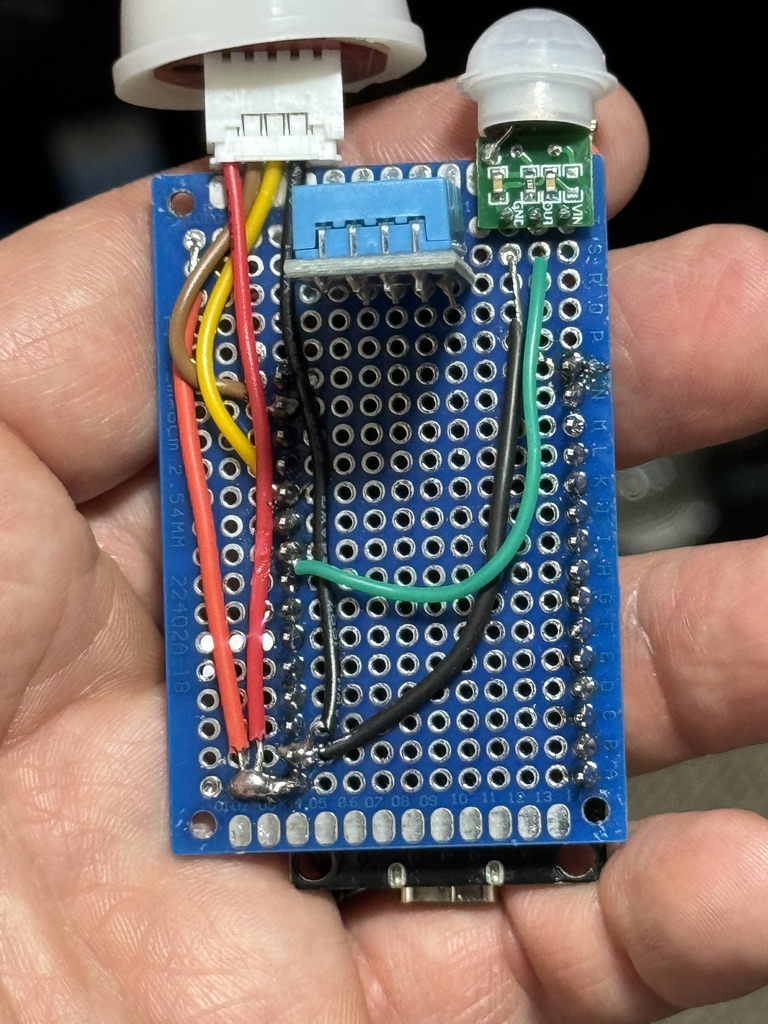
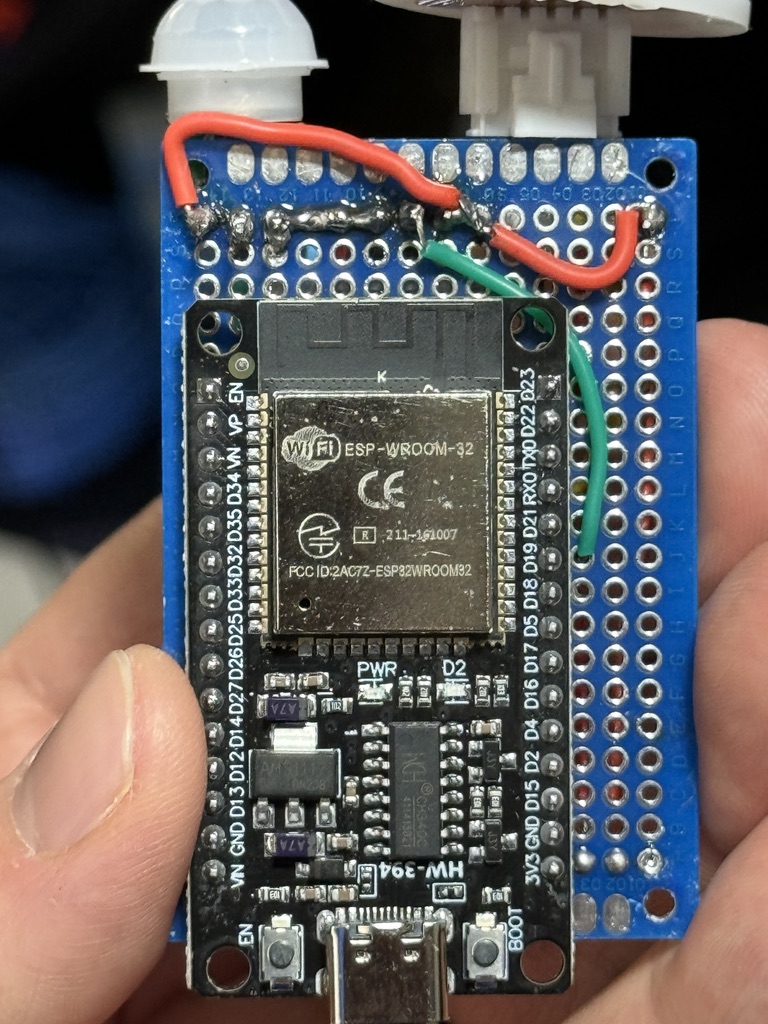
Final Update Pictures
Here is the final product after soldering everything to a prototype board and adding a few more sensors:
References
The only site I used was this one: https://esphome.io/index.html This site had all the links and data I needed to complete this project. Each sensors data sheet is provided by ESPHome as well, however it was not needed in the end.